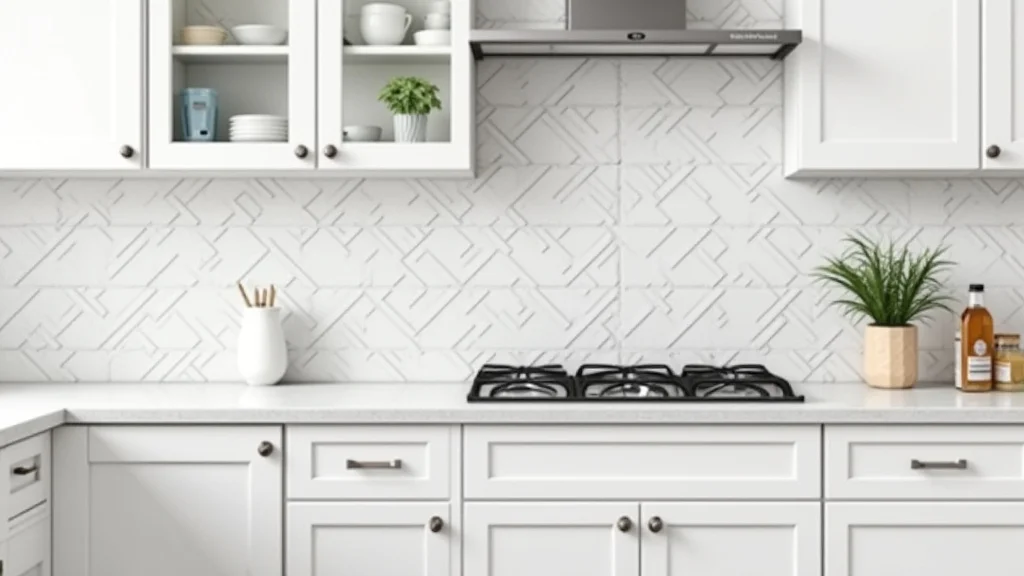
Thinking about updating your kitchen? A new backsplash can make a huge difference, but the cost can be a puzzle. You see beautiful kitchens online and wonder, “What will a kitchen tile backsplash price actually cost me?” It’s a common question for homeowners planning renovations.
This guide will help you break down the factors that influence kitchen tile backsplash price. We’ll explore different materials, installation costs, and ways to save money. By the end, you’ll have a clear idea of what to expect for your project.
Key Takeaways
- The type of tile material significantly impacts the overall kitchen tile backsplash price.
- Labor costs for installation vary based on tile complexity and your location.
- DIY installation can save money but requires specific skills and tools.
- Additional costs like prep work, grout, and sealants add to the final price.
- Choosing the right backsplash can add value and appeal to your home.
Understanding Kitchen Tile Backsplash Price Factors
The cost of your kitchen tile backsplash is not a one-size-fits-all number. Several key elements come into play, and understanding them is vital for budgeting. Think of it like building with LEGOs; the size of your build and the special pieces you choose will affect the final price.
The kitchen tile backsplash price depends heavily on the materials you select and the complexity of the installation.
This section will explore the main drivers behind the price tag. We’ll look at how the tile itself, the area you need to cover, and the installation process all contribute to the final cost. Knowing these details helps you make informed decisions and avoid unexpected expenses.
Tile Material Costs
The material of your tile is perhaps the biggest factor affecting kitchen tile backsplash price. Different materials offer unique looks, durability, and price points. From budget-friendly options to luxurious choices, there’s something for every style and wallet.
Ceramic and porcelain tiles are very popular because they are durable and come in many styles and colors. They are generally more affordable. Ceramic tile is baked at a lower temperature than porcelain, making it a bit softer and more prone to chipping, but also easier to cut and install.
Porcelain tile is fired at a much higher temperature, resulting in a denser, harder, and less porous material. This makes porcelain tile very durable, resistant to stains, and suitable for heavy traffic areas.
Natural stone tiles like granite, marble, and travertine offer a classic, high-end look. However, they typically come with a higher price tag. Marble can be beautiful but is softer and more porous, requiring regular sealing to prevent stains.
Granite is very hard and durable but can be expensive. Travertine has a natural, earthy look but also needs sealing.
Glass tiles offer a modern, reflective appearance and can make a small kitchen feel larger and brighter. They come in sheets and can be a bit more expensive than ceramic or porcelain, and they can be trickier to cut and install. Mosaics, often made of small glass, ceramic, or stone pieces, can create intricate patterns but also increase installation time and cost due to the labor involved.
Metal tiles, such as stainless steel or copper, provide a contemporary or industrial feel. They can be moderately priced to expensive depending on the type of metal and finish. They are durable and easy to clean but can show fingerprints.
Below is a general price range per square foot for various popular tile materials:
| Tile Material | Average Price Per Square Foot |
|---|---|
| Ceramic Tile | $2 – $15 |
| Porcelain Tile | $5 – $20 |
| Glass Tile | $8 – $25 |
| Natural Stone (Marble, Granite, Travertine) | $10 – $50+ |
| Metal Tile | $10 – $30 |
| Mosaic Tile Sheets | $15 – $50+ |
These are just averages, and prices can fluctuate based on brand, design, and where you purchase the tiles. For instance, high-end designer ceramic tiles might cost as much as basic natural stone. Always factor in a few extra tiles for cuts and potential breakage.
A good rule of thumb is to buy 10-15% more than your calculated square footage.
Area Size and Coverage
The amount of space you need to cover directly impacts your total kitchen tile backsplash price. A backsplash behind a stove might only require a few square feet, while covering the entire wall space between your cabinets and countertops will involve a much larger area.
Measure the height and width of the area you intend to tile. For example, if your backsplash runs from the countertop to the bottom of your upper cabinets, measure the length of your countertop and the height from the countertop to the cabinets. Multiply these two numbers to get the square footage.
Always double-check your measurements.
Consider any obstacles like windows, outlets, or light switches. These areas will require special cuts, and while they don’t add to the total square footage, they can increase the complexity and time needed for installation, potentially affecting labor costs.
Let’s say you have a standard kitchen with 25 linear feet of counter space. If your backsplash height is 18 inches (1.5 feet), the total area to cover would be 25 feet x 1.5 feet = 37.5 square feet. If you are using tiles that cost $8 per square foot, the material cost alone would be 37.5 sq ft x $8/sq ft = $300.
Remember to add that 10-15% for waste. So, you’d need to buy around 40-43 square feet of tile.
Installation Costs and Labor
Labor is a significant part of the overall kitchen tile backsplash price. Professional tile installers charge based on their expertise, the complexity of the job, and local market rates. The average cost for professional tile installation can range from $25 to $75 per square foot, but this can be higher for intricate designs or premium materials.
Factors influencing labor costs include:
- The type of tile: Mosaics and intricate patterns take longer to lay than large format tiles.
- Surface preparation: If your existing wall needs repair or a new substrate, this adds time and cost.
- Obstacles: Cutting around outlets, windows, and corners requires more skill and time.
- Location: Labor rates vary significantly by region.
Some installers charge by the hour, while others prefer a per-square-foot rate. It’s essential to get detailed quotes from multiple professionals. Ask what is included in their quote – does it cover removal of old backsplashes, surface preparation, and cleanup?
DIY installation is an option to save on labor costs, but it requires tools, time, and patience. Basic tools needed include a tile saw, trowel, grout float, spacers, and a level. Mistakes can be costly, so ensure you are comfortable with the process before attempting it yourself.
Additional Expenses to Consider
Beyond the tiles themselves and the labor to install them, several other items contribute to the final kitchen tile backsplash price. These are often small costs individually but can add up. Understanding these “extras” helps you create a more accurate budget and avoid surprises.
Think of these as the supporting actors in your kitchen renovation play. They might not be the stars, but they are crucial for the overall performance. Ignoring them can lead to a less polished or incomplete final look.
Adhesives and Grout
You can’t stick tiles to the wall with just hope. You need tile adhesive, also known as thin-set mortar or mastic. The type of adhesive depends on the tile material.
For most ceramic and porcelain tiles, a basic thin-set mortar works well. For natural stone or glass tiles, you might need a specialized adhesive to prevent staining or damage.
Adhesives come in bags of powder that you mix with water or as pre-mixed pastes. The cost can range from $15 to $50 per bag or bucket, depending on the type and quantity. You’ll need enough to cover your square footage.
Grout fills the spaces between tiles. It comes in sanded and unsanded varieties. Sanded grout is used for wider grout lines (1/8 inch or more), while unsanded grout is for narrower lines to prevent scratching delicate tiles.
Grout also comes in various colors to complement or contrast with your tiles.
Grout costs typically range from $10 to $30 per box or bag. You’ll also need grout sealer, especially for porous tiles or grout lines, to protect against stains and moisture. Sealant usually costs around $10 to $20 per bottle.
Proper sealing is essential for maintaining the look and longevity of your backsplash.
Surface Preparation and Tools
Before tiling, the wall surface must be clean, dry, and smooth. If your existing wall has old wallpaper, peeling paint, or is uneven, you’ll need to prepare it. This might involve scraping, sanding, or applying a leveling compound.
For areas prone to moisture, like behind a sink, you might need to install a waterproof backer board, such as cement board or a specialized waterproof panel. This adds to the material cost, typically ranging from $10 to $20 per sheet.
If you are DIYing, you’ll need tools. A tile saw (wet or dry) is essential for straight cuts and can cost $50 to $200+. You’ll also need a trowel for applying adhesive ($5-$15), a grout float ($5-$10), tile spacers ($5-$10), a level ($10-$20), and safety glasses ($5).
Renting tools is also an option if you don’t plan on frequent tiling projects.
Sealing and Finishing Touches
After the grout has cured, sealing the grout lines and porous tiles is highly recommended. This protects against stains, grease, and moisture, which are common in kitchens. A good quality grout and tile sealer will make cleaning much easier and keep your backsplash looking new for longer.
The cost of sealers varies, but a quart typically costs between $15 and $30 and should be enough for most standard backsplashes. Depending on the type of tile, you might need a specific sealer. For example, unpolished natural stone might require a penetrating sealer, while polished stone might use a topical sealer.
Don’t forget about the edges. You might need trim pieces or edge profiles to give your backsplash a clean, finished look. These can be made of metal, plastic, or even wood and can add an additional $5 to $20 per linear foot to your budget.
DIY vs. Professional Installation
The decision between installing your kitchen tile backsplash yourself or hiring a professional is a major one that directly affects the total kitchen tile backsplash price. Each option has its own set of advantages and disadvantages.
Hiring a professional means you’re paying for expertise, speed, and a guaranteed quality finish. They have the right tools and experience to handle tricky cuts and ensure tiles are laid evenly and properly adhered. This can save you time and the frustration of potential mistakes.
The downside is the added labor cost, which can sometimes double the price of the project.
DIY installation offers significant cost savings on labor. If you’re handy, enjoy hands-on projects, and have some basic tiling knowledge or are willing to learn, this can be a rewarding experience. However, it requires investing in or renting tools, and there’s always the risk of errors.
A poorly installed backsplash can look bad and might even require costly repairs or redoing the work.
DIY Installation Process
The DIY process for a kitchen tile backsplash involves several steps. First, carefully measure your space and purchase your tiles, adhesive, grout, and any necessary tools. Then, prepare the wall surface by cleaning it and ensuring it is smooth and dry.
If necessary, install a backer board.
Next, apply the adhesive evenly using a notched trowel. Place the tiles, using spacers to ensure consistent gaps. Cut tiles as needed to fit around outlets and edges.
Once the adhesive has cured (usually 24 hours), remove the spacers and apply the grout using a grout float.
After the grout has set slightly, wipe away excess with a damp sponge. Once the grout is fully cured, clean the tiles and seal the grout lines and any porous tiles. This process can take a weekend or longer, depending on your pace and the complexity of the design.
A typical DIY kitchen tile backsplash price might involve $200-$500 for materials (tiles, adhesive, grout, sealer) for a standard-sized backsplash, plus $100-$300 for tools if you don’t already own them or need to rent them. This makes the total for DIY much lower than professional installation.
When to Hire a Professional
You should consider hiring a professional if your wall surface is damaged or requires significant repair. If your kitchen has unusual angles, many outlets, or complex architectural features, an experienced installer can handle these challenges more efficiently.
If you’re working with very delicate or expensive tiles, like natural stone or intricate mosaics, a professional’s steady hand can prevent costly mistakes. Also, if you are on a tight deadline or simply prefer to have the work done quickly and correctly without the stress, hiring a pro is the way to go.
For example, a homeowner wanting to install a complex herringbone pattern with natural stone tiles might find that the time and potential for error are too high for a DIY project. Hiring a professional tile setter could cost $50-$100 per square foot for labor, bringing the total project cost significantly higher than a simpler ceramic tile DIY job, but it ensures a beautiful and lasting result.
A common scenario where professionals are invaluable is when the existing wall needs to be taken down to the studs and rebuilt, or when the electrical outlets need to be moved. These jobs require specialized knowledge beyond basic tiling.
Cost-Saving Tips for Your Backsplash
Getting a beautiful kitchen tile backsplash doesn’t have to break the bank. With smart planning and a few savvy choices, you can achieve a stunning look without overspending. The kitchen tile backsplash price can be managed with these practical tips.
Think about looking for sales, using more budget-friendly materials, or even tackling certain parts of the project yourself. Every little bit saved can go towards other kitchen upgrades.
Choosing Budget-Friendly Materials
Opting for ceramic tiles is one of the most effective ways to reduce the kitchen tile backsplash price. They are readily available, come in a vast array of styles, colors, and patterns, and are generally much cheaper than natural stone or glass. Large format ceramic tiles can also reduce the number of grout lines, giving a cleaner, more modern look at a lower cost.
Another good option is porcelain tile that mimics the look of natural stone or wood. These can offer the aesthetic appeal of more expensive materials at a fraction of the price. Look for sales and clearance items at your local tile stores or home improvement centers.
Buying tiles during off-season periods or end-of-line selections can also yield significant savings.
Consider patterned tiles that are printed with designs. These are often more affordable than tiles with complex natural veining or intricate handmade patterns. Even a simple subway tile in a classic color can be incredibly stylish and budget-friendly when installed in a creative pattern like a herringbone or a stacked bond.
For example, a homeowner might choose a $3 per square foot ceramic tile instead of a $25 per square foot marble tile. For a 40 square foot backsplash, this saves $880 on material costs alone.
Smart Shopping Strategies
Shop around! Don’t buy the first tiles you see. Visit multiple tile stores, home improvement centers, and even online retailers to compare prices and styles.
Online retailers can sometimes offer better deals, but be sure to factor in shipping costs.
Look for sales events. Many stores have seasonal sales, holiday promotions, or clearance sections. Signing up for email newsletters from your favorite retailers can alert you to upcoming discounts.
Buying tiles in bulk if you need a large quantity might also get you a better price per square foot.
Consider looking at seconds or discounted tiles. These might have slight imperfections that are not noticeable once installed, especially in a busy kitchen environment. Always inspect these tiles carefully before purchasing.
You can often find great deals on discontinued tiles that are still perfectly functional.
Here is a comparison of shopping strategies:
| Strategy | Potential Savings | Considerations |
|---|---|---|
| Shopping at Big Box Stores | Moderate | Wide selection, competitive pricing, but may lack unique options. |
| Visiting Local Tile Boutiques | Lower to Moderate | Unique designs, potentially higher quality, but often higher prices. |
| Online Retailers | Moderate to High | Convenience, wide selection, good prices, but shipping costs and inability to see in person are drawbacks. |
| Clearance/Discount Sections | High | Significant savings, but limited selection and quantities. |
For instance, using an online retailer for basic ceramic subway tiles might save $2 per square foot compared to a local showroom, which for 40 square feet is $80 in savings. Add to that a clearance find of grout at 20% off, and you’re looking at even more savings.
DIY for Specific Tasks
If you’re not up for tiling the entire backsplash yourself, consider handling specific tasks. Removing an old backsplash is often a DIY-friendly job that can save you money on labor. You can usually do this with a putty knife, pry bar, and some patience.
Cleaning and preparing the wall surface is another task you can handle. This includes scraping off old adhesive, sanding rough spots, and ensuring the wall is clean and ready for the tile installer. These preparation steps are crucial for a good tile job.
If you are installing, consider using peel-and-stick tiles for a small area or as a temporary solution. While not as durable as traditional tiles, they are very easy to install and can significantly reduce both material and labor costs for a quick update.
Common Myths Debunked
Myth 1: All tile is the same price per square foot
This is far from true. As we’ve discussed, the material of the tile makes a huge difference. A simple ceramic tile can cost as little as $2 per square foot, while a premium marble or intricate mosaic can easily run $50 or more per square foot.
Even within ceramic or porcelain categories, designs, finishes, and brands can lead to wide price variations.
Myth 2: Grout is just grout and doesn’t affect the price much
While grout is generally less expensive than tiles, specialized grouts can add to the cost. For instance, epoxy grout, known for its stain resistance and durability, is more expensive than standard cementitious grout. Also, the color of grout can sometimes affect price, especially if you’re looking for custom or specialty colors.
Myth 3: You only need to buy the exact amount of tile needed
This is a common and costly mistake. Tile has to be cut to fit around outlets, corners, and edges. Breakage can also occur during cutting or installation.
Professionals always recommend purchasing 10-15% more tile than your measured square footage to account for these necessary cuts and potential breakage.
Myth 4: Natural stone backsplashes are maintenance-free
Many natural stone tiles, like marble and travertine, are porous and require regular sealing to prevent staining and etching from acidic foods and liquids common in a kitchen. They also need specific cleaning products that won’t damage the stone. This maintenance adds time and occasional cost to owning a stone backsplash.
Frequently Asked Questions
Question: What is the average cost for a kitchen tile backsplash?
Answer: The average cost can range widely, from $300 for a simple DIY ceramic tile backsplash to over $3,000 for a high-end natural stone or intricate mosaic installed by a professional. Most homeowners spend between $800 and $1,500 for a mid-range backsplash.
Question: Is it cheaper to use ceramic or porcelain tile for a backsplash?
Answer: Generally, ceramic tile is less expensive than porcelain tile. However, porcelain is denser and more durable, making it a better long-term investment in high-traffic areas, and prices can overlap depending on the design.
Question: How much extra tile should I buy?
Answer: It is recommended to buy 10-15% more tile than your calculated square footage to account for cuts, breakage, and potential future repairs.
Question: Does backsplash installation cost include removing the old backsplash?
Answer: Not always. Always clarify with your installer if the quote includes the removal and disposal of your old backsplash. This is an additional step that can incur extra charges.
Question: Can I use peel-and-stick tiles for a permanent backsplash?
Answer: While peel-and-stick tiles offer a budget-friendly and easy DIY option for a temporary update, they are generally not recommended for a permanent backsplash due to their durability and longevity compared to traditional tiles.
Conclusion
The kitchen tile backsplash price depends on many choices, from the tile material to installation. You can control costs by selecting budget-friendly ceramic or porcelain tiles. Smart shopping and considering DIY for certain tasks also help lower the overall kitchen tile backsplash price.
With careful planning, you can achieve a beautiful and functional backsplash that fits your budget and style. This investment enhances your kitchen’s look and value.